HTML (HyperText Markup Language)
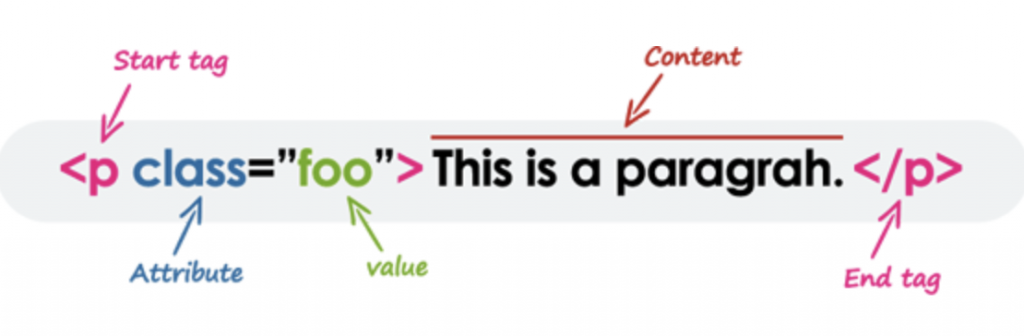
HTML (HyperText Markup Language) is a type of declarative (i.e. we tell the browser what it should do – not how to do it)markup language that is specially designed to be parsed by web browsers. It can be thought similar to XML (eXtensible markup language) in that there are descriptive tags which tell the browser (and coders) what the enclosing (or nested) tags will contain and that there is often deep nesting (i.e. grandchildren and grand-grandchildren tags). What is really cool is that all the webpages you see are made from HTML (sometimes generated dynamically by scripting languages; but this is too advanced for now). These tags such as <p></p> are not shown directly by the browser but rather what is contained directly inside the tags (note that a tag must be enclosed by a ‘/’). To be clear, there is a semantic difference between tag, and element and sometimes they will be used interchangeably. Formally, an element includes the opening/closing tags, content between and any assigned attributes (see below). This element has semantic meaning which the browser will interpret and display. For example h3 is supposed to be a header element of fair importance.
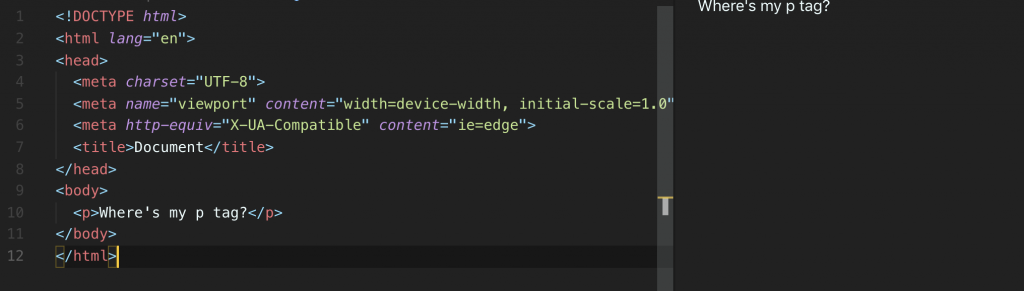
Hint: if you type ‘!” in a html file in VSCode, it will automatically populate your file with some standardized tags for writing a web page!
From above you can see most of what we wish to write to the browser exists between the body tag which is actually also a child (nested) of the html tag (some editors choose not to display the indentation for brevity). Stuff inside the head is usually boilerplate but sometimes contains links to external resources or our own scripts and styling.
Note some tags can be self-enclosing and some can do not show text but rather a graphic (by default – you can change this via CSS; more later) like a horizontal rule <hr/> tag.

All in all there are many elements in HTML and they keep on growing with each spec! The current spec is HTML5 which has elements such as header, article, summary which clearly tells the browser, web-crawlers, and coders what the nested elements/content inside the tag represent! Hint: You are writing an HTML5 document when you using <!DOCTYPE html> at the top! There are simply too many elements to list so I am going to explore one element that is often-used.
Input element and HTML attributes
This element is most often used in forms as users are choosing some call-to-action. The great thing about this element is that it can take many forms just by changing one attribute! Remember above is our anatomy of an element that inside the opening tag of an element, a developer can set certain attributes which will change how the browser will interpret and render the element. This is none-better displayed than using an input tag which can take many type attribute values. Note that the browser has predefined attributes such as type for <input> tags such that creating an attribute named ‘iWantYouToLookLikeThis!11!!’ to Submit won’t render that element to become a button. Remember to enclose those attribute values with quotes!
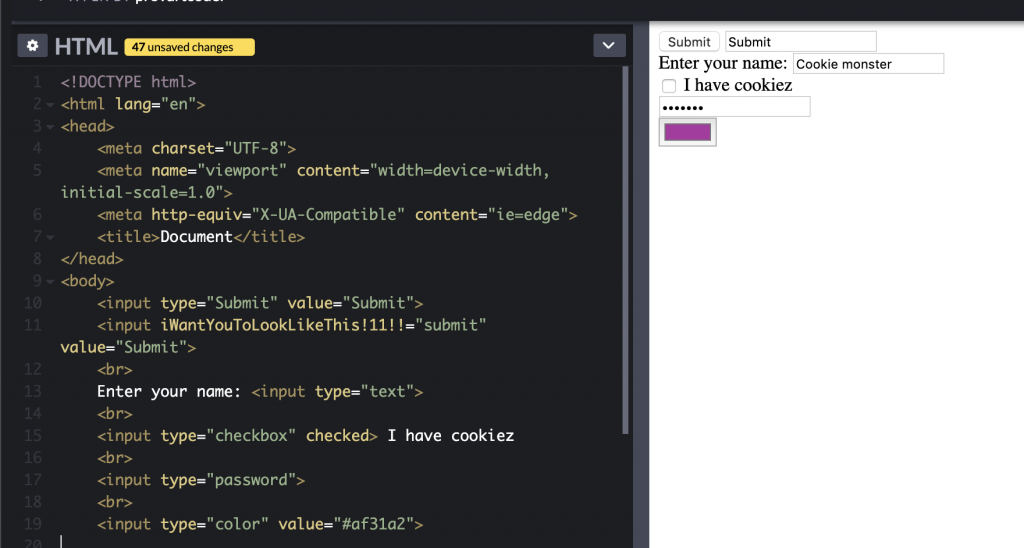
There are many ‘browser-defined’ (based on the HTML spec) attributes, some specific to certain elements and some very ubiquitous like the id and class attribute. These attributes allow us declare an element by a unique identifier and/or by a collection (for which there is some commonality). The usecases for these attributes is to allow us to specifically target an element for scripting/styling or modify many elements. Another common pattern you will see web developers use is to add or remove classes to an element which will dramatically change its styling. How do we change a styling just by adding and removing classes? Good question, let’s introduce CSS!
CSS (Cascading Style Sheets)
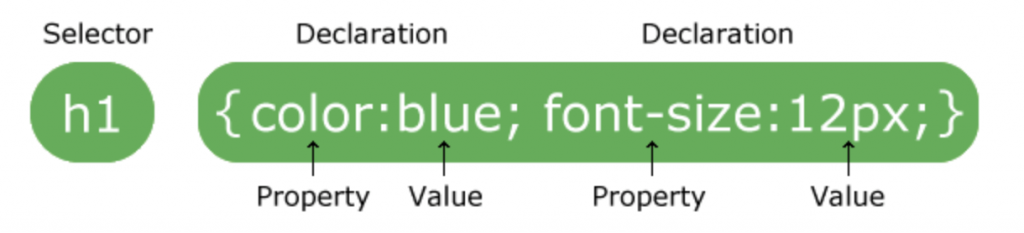
CSS describes how HTML elements should be displayed on media. A stylesheet is a composed of a bunch of rules of how your elements should look like. It is called cascading because you have many external CSS files in one HTML document which may or may not overlap each other. At the base of all how CSS works is that it targets specific elements via selectors that you create and describe. Inside the selector are your style property and values. I’ll be covering the three main ways to inject CSS into your HTML document: inline, internal and external. In reality, almost all modern styling is done via external stylesheets and are imported into the project as needed as it allows compartmentalization and is the most liberal.
Internal Stylesheet
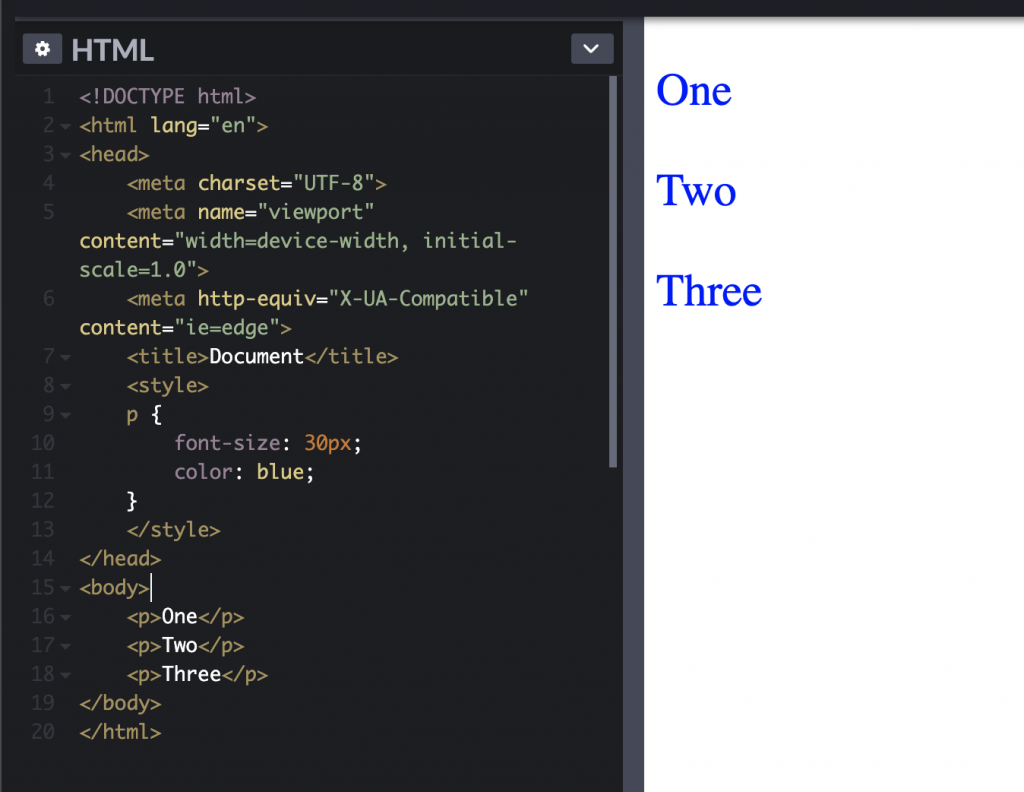
This is where you set a stylesheet the HTML document so you do not need to load in an external stylesheet. There can be certain usecases for this such as if you want to lower the amount of web requests to your server but is fairly out-of-date. Anyways, you use a style tag inside the head tag of your HTML doc and simply write your rules there.
External Stylesheet
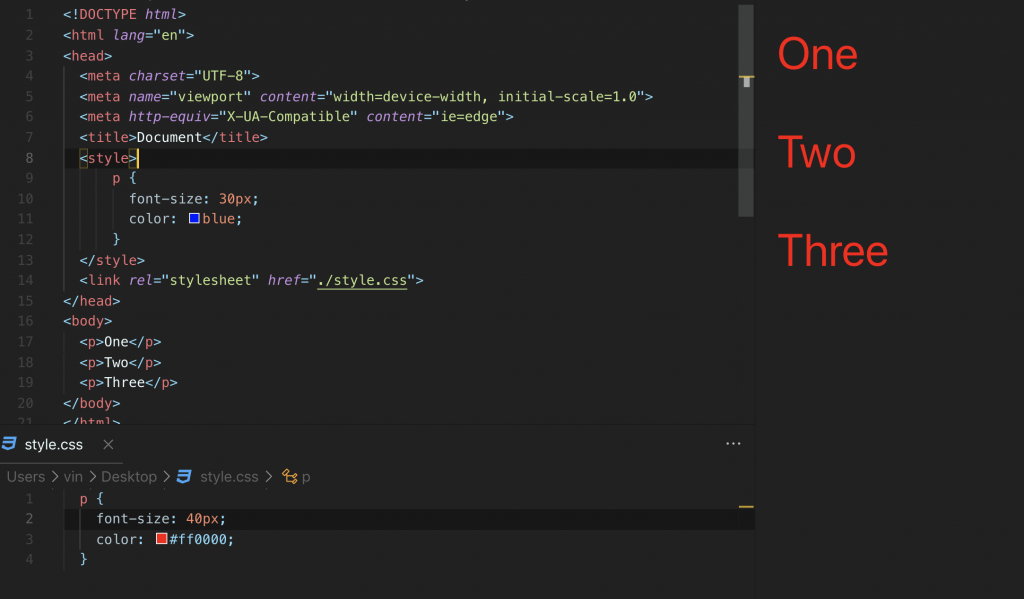
This is where you write a stylesheet (.CSS file) and import it to the HTML file (it needs to know the path of the CSS/stylesheet file). Whether an internal or external stylesheet overrides another (at the same specificity level – more later) depends on which comes after each other in the head tag. See below.
Inline Styling
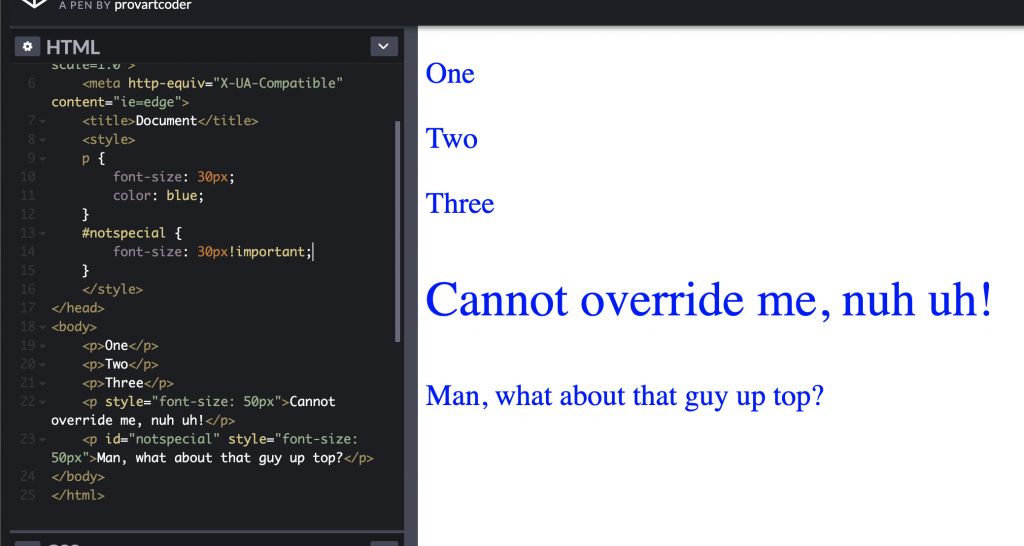
The most controversial of the bunch because any styling set here cannot be overriden other than with an !important flag added to the end of a CSS property (before the semi-colon). Try below in the codepen. It is controversial because developers easily set styling via scripting when generating HTML on the fly and become CSS-independent. However this makes it a huge hassle for future developers/designers who have to write many !importants. Some argue that is a good thing as it couples a scripting function with its styling with how it was meant to originally look like as there can be dozens of CSS files in a given webpage (i.e. increase reusability). I suggest you avoid this for now unless you have a good reason to use inline styles. Note how we also don’t need to use selectors here because we are just telling the browser to make this element look this way?
CSS Selector Specificity
If you walked through the above carefully you would have noticed that elements are targeted by CSS via selectors and some can be more specific than others. If a CSS selector is more specific than another, that CSS property (if they are competing for the same property such as ‘color’) will ‘win’ and override the other styling. Hence you should know the CSS selector priority rules and how to create selectors. In general, for CSS you want to use the classes attribute (note one element can have many classes – this is space separated).
Oh yeah, we use ‘.className’ and ‘#id’ in CSS to differentiate between the two in our selectors. Also remember you should really only have one unique id name in your whole webpage. When scripting use a number iterator to append to your id if you need to.
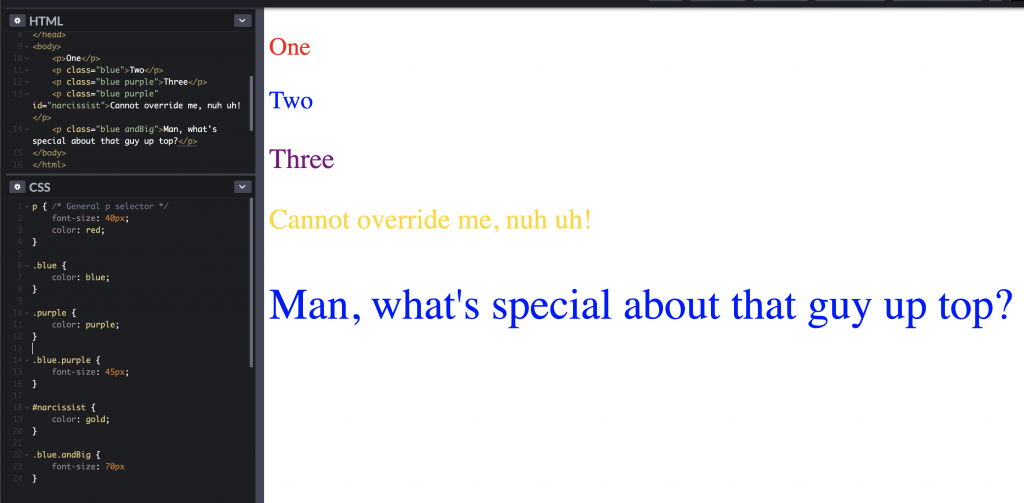
There are essentially 3 (really 4 if you include in-line styles) types of styling specificity you can write an CSS selector with: id based, class based, and element-based (targeting all p tags for example). Imagine we have a counter that by default is like this 0 0 0 from highest specificity from right to left. These counters represent how many respective (from above) selector types are in a given element. For any given element and its many given CSS selectors, if there are competing properties (like colour below), the one with the greater number will ‘win’ where the rightmost number is given first priority. That is, 0 20 0 would lose to 1 2 0 but 1 20 0 would win if it faced 1 19 0. Note the below Codepen and its multiple CSS selectors. Does this all make sense to you? Ask yourself these questions:
- Why does the font-size CSS property apply to ‘one’ ‘two’ and ‘three’ when there is a stronger selector (i.e.
.blue)? - Why is ‘three’ purple and not blue?
- Why is the fourth
ptag gold? - Can you make that
#narcissista poop-brown (color: #7A5901;) – what selector would you use? - Why does almost everyone suggest using classes for the vast majority of styling rather than ids? Hint recall our counter above and what is the most specific thing.
Closing Remarks and Tips
Remember how HTML is nested? It is not just for semantic reasons! Elements can inherit their parents’ styling properties. Generally, it inherits the closest parent’s styling. These inherited styling can be overriden by writing your own rules above. If you are messing with your own webpage I suggest you use your browser’s dev tools, inspecting an element (right click on it) and modifying its styling directly rather than constantly making small changes to your CSS file! The resources for HTML and CSS are vast so I will let you explore on your own. But remember that learning by doing is one of the best ways to do things. I can’t recall all the types of input, but I know it is an incredibly useful element due to my constant fiddling with its attribute! HTML/CSS is very much the same, the resources for attribute types/values and CSS properties are definitely out there.